I’m Back! Coconut Milk Cupcakes

Hey guys! So it’s been exactly a month and one day since my last post! Which means, it’s been way too long! My trip abroad was absolutely amazing! I’ll share some delightful dessert photos from it at the end of the post. I came back from my trip tired and happy. But, a few days into my groggy stupor of jet-lag, I started jonesing for some baked goodness. I found some coconut milk in our fridge and thought, it must be a sign!

Now, I must admit, due to my jet-lagged stupor, I did cut some corners with the recipe which made not so pretty consequences with the frosting. As you can see form the photo, the frosting was a little drippy, haha! They still tasted yummy, especially the cupcakes themselves, but, I’d advise you not cut corners and follow the recipe to the “T”. So what I didn’t do was reduce the coconut milk. It takes a good a few hours and I just didn’t want to wait. Lesson learned! Haha! But, you’re supposed to reduce the coconut milk for the cupcakes, as well and they turned out just delectable. So you can take that for what it is 🙂

So first, reduce your coconut milk! [Directions at the bottom]

Now once your coconut milk is reduced and chilled AND then brought back to rom temp [hah!]. Preheat your oven to 350! Beat the butter till smooth then add the sugar and beat unti light and fluffy.

Then mix 2 eggs one at a time. Once that us incorporated mix in seeds from vanilla bean or pure vanilla extract. Mix in the last egg!

Mix all the remaining dry ingredients together. Then alternating, beat in half the dry ingredients and half the coconut milk till it’s all gone. Pour into your prepared cupcake pans.

Bake for 25-30 minutes or until the tops of the cupcakes spring back when touched. The batter makes a lovely light cake.

My cupcakes look deflated because I didn’t test them before I took them out. The recipe says 20 minutes, but mine definitely needed an added 5-7 minutes to poof up. My second batch looked much cuter. 🙂

Make your frosting with your reduced coconut milk. If you dont reduce it, like me, the frosting is too liquidy and will look curdled and be a little drippy. Haha, all the things you don’t want in frosting! It still tastes yummy, but half the fun in cupcakes is the aesthetics. Anyway here’s my less than pleasing to the eye frosting:

I placed it in a piping bag and piped on the frosting.

I then decided to dabble on some sprinkles to try and avert the eye from the oddly oozing frosting haha!

All in all they were quite tasty! They just looked a tad…off. Heh, lesson learned: never cut corners in the science of baking [unless it’s proven successful!]. I’d recommend to just reduce your coconut milk before using and you’ll have tasty AND cute cupcakes.

Coconut Milk Cupcakes

INGREDIENTS

  • 2 13-to 14-ounce cans unsweetened coconut milk [this is for both the cupcakes and the frostin]
  • 2 cups all purpose flour
  • 2 1/4 teaspoons baking powder
  • 1/2 teaspoon salt
  • 3/4 cup (1 1/2 sticks) unsalted butter, room temperature
  • 1 1/3 cups sugar
  • 3 large eggs
  • Seeds scraped from 1 split vanilla bean or 1 1/2 teaspoons vanilla extract
  • 1 cup reduced coconut milk, room temperature

DIRECTIONS 

For reduced coconut milk:
Bring coconut milk to boil in large deep saucepan over medium-high heat (coconut milk will boil up high in pan, so be careful!). Reduce heat to mediumlow; boil until reduced to 1 1/2 cups, stirring occasionally, 25 to 30 minutes. Remove from heat; cool completely. Transfer to small bowl. Cover; chill (coconut milk will settle slightly as it cools). For those of you who are lazy, like me, DO THIS AHEAD OF TIME: Can be made 2 days ahead. Keep chilled. Bring out of fridge when you’re ready to use and make sure it’s at room temp.

For cupcakes:
Position rack in center of oven; preheat to 350°F. Line eighteen 1/3-cup muffin cups with paper liners. Whisk flour, baking powder, and salt in medium bowl. Using electric mixer, beat butter in large bowl until smooth. Add sugar; beat on medium-high speed until well blended, about 2 minutes. Add 2 eggs, 1 at a time, beating well after each addition and occasionally scraping down sides of bowl. Beat in seeds from vanilla bean and remaining egg. Add half of flour mixture; mix on low speed just until blended. Add 1 cup reduced coconut milk; mix just until blended. Add remaining flour mixture; mix on low speed just until blended. Divide batter among muffin cups. Bake cupcakes until tops spring back when gently touched and tester inserted into center comes out clean, about 20 minutes. Transfer cupcakes in pans to rack; cool 10 minutes. Carefully remove cupcakes from pans and cool completely on rack.

Coconut Milk Frosting

INGREDIENTS

  • 1 cup (2 sticks) unsalted butter, room temperature
  • 2 1/2 cups powdered sugar
  • 1/3 cup reduced coconut milk (see above), room temperature
  • Seeds scraped from 1 split vanilla bean or 1 1/2 teaspoons vanilla extract
  • 1/8 teaspoon salt
  • 1 1/2 cups sweetened flaked coconut, lightly toasted (for garnish) or…sprinkles 🙂

DIRECTIONS

Using electric mixer, beat butter in large bowl until smooth. Add sugar, 1/3 cup reduced coconut milk, seeds from vanilla bean, and salt. Beat on medium-low speed until blended, scraping down sides of bowl. Increase to mediumhigh and beat until light and fluffy.

Pipe on cooled cupcakes with whichever tip you want and garnish accordingly. 🙂

Alright, so I promised to show some delectable Turkish and Italian dessert photos from my recent trip. Here you are!

Let’s start with Turkey:

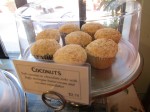
We walked through the streets of Istanbul and saw shops and restaurants with gorgeous vitrines full of yummy delights! Here there are different puddings.

Then we saw this delicious looking profiterole concoction.

This was a delicious honey cake I did try later and it was amazing!

On the right is a type of solidified rice pudding that was my mom’s favorite by far. I wasn’t too fond of the graininess in the texture, but it was fun to try!

We, obviously, came across a myriad of baklava:

We also came across and ate a ton of Turkish Delights!

We never got the chance to try these, but they looked very interesting. Tehy were balls of halva rolled into different kinds of nuts.

Then on the last night in Turkey, I got this amazing honey drenched cake with clotted cream dolloped in top. I still have longing dreams about this amazing dessert.

My mom chose a different version of her favorite broiled rice pudding with a scoop of Turkish vanilla ice cream.

Now, on to Italy!

While in Rome, I had my first Italian Cannoli! Delish!


Of course, we had our fair share of gelato!


Had one of the tastiest Tiramisu’s in my life ata little restaurant in front of the Trevi Fountain called, Il Chianti.

We washed it down with some espresso.

And then, our veri friendly waiter brought us some after dessert delights of chocolate dipped almond slivers.

On a different evening, after stuffing myself with too much pasta, I needed a light dessert and was surprised with a very fresh and sweet bowl of fragola [strawberries] topped with a mascarpone cream. Mmmmmm

Then, while in Florence, near the Duomo, I saw these cute little guys called: Baba. Baba in Farsi means Dad and my dad didn’t come with us on the trip and I missed him a lot so I thought it was a sign that I should buy one. It was delicious. It was a little sponge cake soaked in honey and alcohol. Yum!

Another Florentine treat I had was Cantucci di Prato. It’s delicious anise flavored biscotti that you dip in sweet wine. Here were some Cantucci in a vitrine. I, unfortunately, didn’t take a photo of the one I ate.

A different night in Florence, my Aunt and I had panna cotta. Mine was topped with chocolate and hers with fruit.

My mom, on the other hand, had an interesting take on tiramisu. It was Tiramisu with fruit in it and the lady fingers were soaked in Grand Marnier instead of Espresso.

All in all, it was a fantastic trip. And now, I’m back to continue my love of baking and sharing it with you guys!


Hope you Enjoyed!

-Me


Leaving for Turkey then Italy today!

Hey guys!

Just wanted to let you all know that I will be leaving for Istanbul, Turkey today. I will be in Turkey for a few days and then we head over to Italy until June 16th. I will make sure to take photos of all my amazing dessert finds so I can share them with everyone when I get back!

Have a great couple of weeks!

Happy Baking!

-Me

PS. If you get bored while I’m gone. Check this out. I got my very first short story published! Hope you all enjoy!

Chocolate and Vanilla Cake Pops

So another of the desserts I made for Rob’s birthday are cake pops!

These are REALLY easy and REALLY festive! You can either take boxed cake or make your own batter. I made chocolate cake and yellow cake.

Make cream cheese frosting, or just grab canned cream cheese frosting. If you make your own, use 3/4 of a c If you use the can, use half the can. Mix it with your COOLED cake.

Make round balls and place in a baking dish or cookie sheet.

Place the dish in the freezer for 5 minutes to firm the balls up. Then take your candy melts and melt them. This part is really sensitive. Only put it in for 30 sec- 1 minute at a time and mix after each round to make sure they don’ get too hot and burn. My pink Candy melts burned and you get bumpy pops instead of smooth ones. Also, it’s really important not to get any water in the candy melts or else they’ll harden, as well.

Then take your lollipop sticks [you can find them at Michaels] and dip the tips in the correct color candy melt and then stick them less than half way through in the cake balls.

Place them in the fridge overnight or in the freezer for at least 15 minutes. Dip in the colored candy melt you want and make sure to sprinkle on whatever decorations you want while the pop is still wet. They dry really quickly!

Have a styrofoam block ready and stick them in the block to dry.

They were really yummy and really simple to make!


THINGS NEEDED

  • yellow cake
  • chocolate cake
  • two colors of candy melt
  • sprinkles
  • lollipop sticks
  • styrofoam block


CHOCOLATE CAKE


INGREDIENTS

  • Unsalted butter, for pan
  • 1 1/2 cups all-purpose flour, plus more for pan
  • 3/4 cup unsweetened Dutch-process cocoa powder
  • 1 1/2 cups granulated sugar
  • 1 1/2 teaspoons baking soda
  • 3/4 teaspoon baking powder
  • Salt
  • 2 large eggs
  • 3/4 cup warm water
  • 3/4 cup low-fat buttermilk
  • 3 tablespoons vegetable oil
  • 1 teaspoon pure vanilla extract

DIRECTIONS

  1. Preheat oven to 350 degrees. Make the cake: Butter and flour a 7-inch round cake pan (3 inches deep). Sift flour, cocoa powder, granulated sugar, baking soda, baking powder, and 3/4 teaspoon salt into a large bowl. Add eggs, warm water, buttermilk, oil, and vanilla. Beat with a mixer on medium-high speed until smooth, about 3 minutes.
  2. Pour batter into prepared pan, and bake until a toothpick inserted into the center comes out clean, 55 to 60 minutes. Let cool completely in pan.


YELLOW CAKE

INGREDIENTS


  • 1 cup (2 sticks) unsalted butter room temperature
  • 3 cups all-purpose flour plus more for dusting
  • 1 tablespoon baking powder
  • 1 teaspoon baking soda
  • 1/2 teaspoon salt
  • 2 cups sugar
  • 4 large eggs
  • 1 1/4 cups buttermilk
  • 1 1/2 teaspoons pure vanilla extract
DIRECTIONS


  1. Preheat oven to 350 degrees. Butter one 10-inch tube pan. Dust the bottom and sides of pan with flour, and tap out any excess. Sift together flour, baking powder, baking soda, and salt; set aside.
  2. In the bowl of a standing mixer fitted with the paddle attachment, beat butter until softened, 1 to 2 minutes. Gradually add sugar, and continue beating until light and fluffy, about 4 minutes. Add eggs one at a time, beating after each addition until well incorporated, occasionally scraping down the sides of bowl.
  3. Mix together buttermilk and vanilla. Slowly add the sifted flour mixture alternately with the buttermilk mixture in three additions, beginning and ending with the flour mixture. Do not overbeat.
  4. Pour batter into prepared tube pan, and until cake tester inserted into center of cake comes out clean, about 40 minutes. Transfer to a wire rack to cool for 15 minutes. Remove cake from pan, and cool completely on wire rack. Cake can be stored in freezer, double wrapped with aluminum foil, for up to 1 month.
CREAM CHEESE FROSTING

INGREDIENTS
  • 1/2 pounds cream cheese, softened
  • 1/2 sticks unsalted butter, softened
  • 3/4 cups confectioners’ sugar
  • 1/2 teaspoons pure vanilla extract
DIRECTIONS
eat cream cheese, butter, and 1/4 cup sugar with a mixer on medium speed until combined. With machine running, add remaining 1/2 cups confectioners’ sugar, 1/8 cup at a time, beating well after each addition. Add vanilla, and beat until pale and fluffy, about 4 minutes more.

ASSEMBLY
  1. Bake Cakes
  2. Let cake cool completely
  3. Make cream cheese frosting
  4. Mix each cake with 3/4 c frosting
  5. Make Cake balls
  6. place in freezer for a few minutes
  7. Melt Candy melts
  8. Dip tips of lollipop sticks in candy melts
  9. Stick less than half way in cake ball
  10. Keep in fridge overnight or in freezer for 15 minutes
  11. Dip Pops in melted candy
  12. SPrinkle with decorations
  13. Place in prepared Styrofoam block
Hope you guys enjoy!
Happy Baking!
-Me


Blue Velvet Butterfly Cupcakes

So, for Robin’s Birthday I made a slew of yummy desserts and stuff. We’ll begin with blue velvet cupcakes topped with blue butterflies.

They turned out really cute and I love velvet cupcakes! So I found these adorable cupcake liners!

They were really cute and appropriate for my butterfly cupcakes!

Preheat your oven to 350! Mix all the dry ingredients together!

Mix the oil and sugar. Then mix in the eggs. Alternate the dry mixture into the egg mixture with buttermilk. Mix the baking soda with the vinegar and mix that into the batter.

Tint with blue dye till you have the desired color.

Pour into prepared tins and bake for 20 minutes.

Pipe on cream cheese frosting. In the photos I piped them on in a swirl, but don’t do this. I had to flatten them out before I put the butterflies on.

Place body of the butterfly on.

Then place white chocolate chips on side for supports.

Lean wings on the chocolate chips.

Place the antennae.

I’ll post a finished dessert table photo in a later post 🙂

BLUE VELVET CUPCAKES

CUPCAKES

INGREDIENTS

  • 2 1/2 cups cake flour (not self- rising), sifted
  • 2 tablespoons unsweetened Dutch-process cocoa powder
  • 1 teaspoon salt
  • 1 1/2 cups sugar
  • 1 1/2 cups vegetable oil
  • 2 large eggs, room temperature
  • 1/2 teaspoon blue gel-paste food color
  • 1 teaspoon pure vanilla extract
  • 1 cup buttermilk
  • 1 1/2 teaspoons baking soda
  • 2 teaspoons distilled white vinegar

DIRECTIONS

  1. Preheat oven to 350 degrees. Line standard muffin tins with paper liners. Whisk together cake flour, cocoa, and salt.
  2. With an electric mixer on medium-high speed, whisk together sugar and oil until combined. Add eggs, one at a time, beating until each is incorporated, scraping down sides of bowl as needed. Mix in food color and vanilla.
  3. Reduce speed to low. Add flour mixture in three batches, alternating with two additions of buttermilk, and whisking well after each. Stir together the baking soda and vinegar in a small bowl (it will foam); add mixture to the batter, and mix on medium speed 10 seconds.
  4. Divide batter evenly among lined cups, filling each three-quarters full. Bake, rotating tins halfway through, until a cake tester inserted in centers comes out clean, about 20 minutes. Transfer tins to wire racks to cool completely before removing cupcakes. Cupcakes can be stored overnight at room temperature, or frozen up to 2 months, in airtight containers. 

CREAM CHEESE FROSTING

INGREDIENTS

  •  8 ounces (2 sticks) unsalted butter, room temperature
  • 12 ounces cream cheese, room temperature
  • 1 pound (4 cups) confectioners’ sugar, sifted
  • 3/4 teaspoon pure vanilla extract

DIRECTIONS

  1. Beat butter and cream cheese with a mixer on medium-high speed until fluffy, 2 to 3 minutes. Reduce speed to low. Add sugar, 1 cup at a time, and then vanilla; mix until smooth. 
BUTTERFLIES

INGREDIENTS

  • blue candy melts
  • chocolate candy melts
  • parchment paper
  • piping bags
  • small round piping tips
  • white non-pareils
DIRECTIONS
Check out the directions with photos in this post 🙂

I hope you guys enjoyed!

Happy Baking!


-Me 


Surprise Birthday Cupcakes for Sheva’s Mom

My beautiful roommate, Sheva, threw a surprise birthday for her Mom! It was really cute and I made birthday cupcakes! Sheva wanted something light, tasty and chic. This is what I came up with:

It’s a white cake cupcake, dipped in ganache, decorated with white non pareils and homemade white chocolate leaves.

So, make your white cake cupcakes.

Make ganache.

While you wait for your ganache to thicken, make your white chocolate leaves. Go outside and pick a few leaves you think are pretty. Melt white chocolate. dip the bottom side of the leaf in the chocolate.

Place the leaf in the freezer for a minute or two. Then peel the leaf off.

Then you end up with this!

Dip the cupcakes in ganache and then dip half in white non pareils.

I made round chocolate dots with chocolate candy melts, but you can use large chocolate chips if you’d like. Place one in the center of the cupcake.

Then place a mini chocolate chip off to it’s side.

Place a leaf on the mini chocolate and dig the end of it under the chocolate round in the middle.

Place another mini chocolate chip to the side.

Place another leaf on the cupcake.

Place one more!

Voila!

I have this really pretty cupcake tier that my beautiful roommate bought me. It was perfect for the party.

Everyone really liked them and they tasted light and yummy!

WHITE CAKE CUPCAKE

INGREDIENTS

  • 4 1/2 cups sifted cake flour (not self-rising)
  • 2 tablespoons baking powder
  • 3/4 teaspoon salt
  • 1 1/2 cups milk
  • 1 tablespoon pure vanilla extract
  • 1 cup plus 2 tablespoons (2 1/4 sticks) unsalted butter, softened
  • 2 1/4 cups sugar
  • 7 large egg whites

DIRECTIONS

  • Preheat oven to 350 degrees. Line cupcake or muffin tins with papers; set aside. Into a medium bowl, sift together cake flour, baking powder, and salt. Combine milk and vanilla in a glass measuring cup.
  • Place butter in the bowl of an electric mixer fitted with the paddle attachment, and beat until pale and creamy. With mixer on medium speed, gradually add sugar in a steady stream; continue beating until light and fluffy, about 3 minutes. Reduce speed to low.
  • Add flour mixture to butter mixture in three batches, alternating with the milk mixture and starting and ending with the flour. Do not overbeat.
  • In a clean bowl of electric mixer fitted with the whisk attachment, beat egg whites on medium-high speed until stiff peaks form. Fold one-third of the whites into flour mixture to lighten. Fold in remaining egg whites in two batches, being careful not to deflate the whites.
  • Pour batter into prepared tins, filling cups to about 1/2 inch from the tops. Bake until a cake tester inserted near the centers comes out clean and the tops spring back when pressed lightly in the center, 18 to 20 minutes. Remove from oven; let cool completely before icing or storing.

GANACHE

INGREDIENTS

  • 3/4 + 1/8 cups heavy cream
  • 6 ounces best-quality semisweet chocolate, finely chopped

DIRECTIONS

Bring the cream just to a boil, stirring occasionally, in a small saucepan over medium heat; remove from heat. Put the chocolate in a medium heatproof bowl, and pour the cream on top; let stand for 5 minutes. Gently stir until the ganache is smooth and glossy. Refrigerate the ganache, stirring occasionally, until slightly cooled and thickened, about 10 minutes (do not let it harden).

Happy Birthday Farzin Joon! I had such a great time at your party! Here are some fun photos from the evening.

Here we have Sheva’s mom when we first surprised her!

Here’s me and my roommate. She’s so pretty.

Me and my pretty mom!

The family and my cupcakes on the side!!!

One last shot of my cupcakes before they got eaten!

Me and my mom being cool. 🙂

Hope you guys enjoyed!

Happy Baking!

-Me

Mocha Butterfly Cupcakes

My mom bought me the companion book to What’s New, Cupcake?, called Hello, Cupcake!. It had this gorgeous idea with monarch butterflies. Here’s the result!

Alright, so I have a lot to update on. So, I’m going to try and make the intros as quick as possible. I apologize for any loss of wit :p Preheat your oven to 350! Make your batter and pour into your prepared pans.

Bake for 20-25 minutes, or till a toothpick comes out clean.

You can top the cupcakes with whatever type of frosting you’d like. If you’re going for butterflies though, I’d recommend a thicker, sturdier frosting, so I chose my go to, Swiss Meringue Buttercream!

Reserve 1/2 c and tint brown with cocoa powder. I tinted the rest yellow and then spread flat on my cupcakes.

Now on to the butterflies. Don’t be intimidated. They’re actually pretty easy, just kinda tedious. I wanted to use orange candy melts because I was making Monarch butterflies, but Michaels was out of orange!!! Travesty!!!! So, I bought beige 😦 it was alright. But, you should really try with all colors. I made them again with light blue and they turned out soooo cute!

Grab some parchment paper, dark chocolate candy melts and your colored candy melts. Melt the candies and place in piping bags with small round tips. Draw matching butterfly wings.

Fill it in with whatever other color melt you want.

Now melt in microwave for 5-6 seconds.

Take a knife and drag the dark chocolate into the colored candy melt.

Sprinkle on white non-pareils onto the wings.

Now on another parchment pipe antennae. I also piped little chocolate pebbles because the m&m’s I bought for supports [I’ll explain later] melted in the Los Angeles heat! The next time I made these, I just piped bodies out of chocolate, as well. This first time I piped cocoa powder tinted frosting, but I liked the look of the chocolate bodies better.

Now for assembly. Place two supports [you can choose chocolate chips, brown m&m’s, or make your own] spaced out on the cupcake.

Place a wing leaning on each support.

Either place a prepared chocolate body or pipe the reserved chocolate frosting.

Then place the antennae.

Truthfully, I didn’t like the way the chocolate frosting looked, so I tried to add texture with chocolate jimmies.

I made cupcakes with two little butterflies as well.

They were really easy and very pretty! Plus, the mocha cupcakes were absolutely delicious! I recommend them!

MOCHA CUPAKES

INGREDIENTS

  • 1 cup plus 2 tablespoons unsalted butter, room temperature, plus more for pans
  • 1 cup plus 2 tablespoons unsweetened Dutch-process cocoa powder, plus more for pans
  • 2 1/2 cups plus 2 tablespoons all-purpose flour
  • 2 teaspoons baking soda
  • 1/8 teaspoon salt
  • 1 cup granulated sugar
  • 1 cup packed dark-brown sugar
  • 3 large eggs, room temperature
  • 3/4 cup sour cream
  • 1 1/2 cups buttermilk

DIRECTIONS

  • Preheat oven to 350 degrees. Brush mini muffin tins with softened butter; dust with cocoa. In a medium bowl, whisk together cocoa, flour, baking soda, and salt.
  • With mixer on medium-high, cream butter and granulated sugar until pale. Add brown sugar; beat until fluffy. Add eggs, one at a time, beating well and scraping bowl. Mix in sour cream. On low, add flour mixture in three batches, alternating with buttermilk, and beginning and ending with flour, until just combined.
  • Divide batter among tins, filling 3/4 full. Bake until firm to the touch and a cake tester inserted in centers comes out clean, 8 to 10 minutes, rotating halfway through. Transfer tins to racks to cool for 5 minutes. Remove from tins; let cool completely.

SWISS MERINGUE BUTTERCREAM

INGREDIENTS

  • 5 large egg whites
  • 1 cup plus 2 tablespoons sugar
  • Pinch of salt
  • 1 pound (4 sticks) unsalted butter, cut into tablespoons, room temperature
  • 1 1/2 teaspoons pure vanilla extract

DIRECTIONS

  1. Combine egg whites, sugar, and salt in the heatproof bowl of a standing mixer set over a pan of simmering water. Whisk constantly by hand until mixture is warm to the touch and sugar has dissolved (the mixture should feel completely smooth when rubbed between your fingertips).
  2. Attach the bowl to the mixer fitted with the whisk attachment. Starting on low and gradually increasing to medium-high speed, whisk until stiff (but not dry) peaks form. Continue mixing until the mixture is fluffy and glossy, and completely cool (test by touching the bottom of the bowl), about 10 minutes.
  3. With mixer on medium-low speed, add the butter a few tablespoons at a time, mixing well after each addition. Once all butter has been added, whisk in vanilla. Switch to the paddle attachment, and continue beating on low speed until all air bubbles are eliminated, about 2 minutes. Scrape down sides of bowl with a flexible spatula, and continue beating until the frosting is completely smooth. Keep buttercream at room temperature if using the same day.

CHOCOLATE BUTTERFLIES

INGREDIENTS

  • parchment paper
  • chocolate candy melts
  • colored candy melts
  • piping bag
  • small round tip
  • white non-pareils

DIRECTIONS

Follow Directions above from photos 🙂


I hope you guys enjoy! They turn out very beautiful!

Happy Baking!

-Me

Raspberry Macarons

Ever since I saw these in France, I couldn’t wait to try and make them! They turned out pretty well!

Here are your basic ingredients:

Mix the almond flour and confectioner’s sugar together.

Preheat oven to 280 degrees. Whisk egg whites till foamy, then mix in the cream of tartar. Whisk until soft peaks form, the mix in sugar. Mix until stiff peaks form.

Now mix in whatever dye you’d like.

Now fold in the flour.

Fold around 50-75 times. Here’s a quick tip on how to check if it’s the right consistency. spoon a little on a plate. If the top flattens out by itself then it’s good. If the peak stays then beat a few more times.

Now put the mixture in a pastry bag with a round tip and pipe out little discs on a prepared pan lined with parchment paper.

Let them sit for half an hour to and hour. This gives the shells a little time to harden.

While you wait, mix the mascarpone cheese with 2-3 tbsp seedless raspberry jam.

Now bake the macarons for 15-20 minutes. Take them out and let them cool completely. Spread a thin layer of cheese mixture on the flat side of a cookie and then sandwich it.

They were quite cute and tasty!

RASPBERRY MACARONS

COOKIES

INGREDIENTS

  • 1 cup confectioners’ sugar
  • 3/4 cup almond flour
  • 2 large egg whites, room temperature
  • Pinch of cream of tartar
  • 1/4 cup superfine sugar

DIRECTIONS [courtesy of tartlette]

Mix almond flour and confectioner’s sugar. In a stand mixer, fitted with the whisk attachment, whip the egg whites to a foam, (think bubble bath foam) gradually add the sugar until you obtain a glossy meringue (think shaving cream). Do not overbeat your meringue or it will be too dry.  Add the flour mixture to the meringue, give it a quick fold to break some of the air and then fold the mass carefully until you obtain a batter that falls back on itself after counting to 10. Give quick strokes at first to break the mass and slow down. The whole process should not take more than 50- 75 strokes. Test a small amount on a plate: if the tops flattens on its own you are good to go. If there is a small beak, give the batter a couple of turns.


Fill a pastry bag fitted with a plain tip (Ateco #807 or #809) with the batter and pipe small rounds (1.5 inches in diameter) onto parchment paper or silicone mats lined baking sheets. Let the macarons sit out for 30 minutes to an hour to harden their shells a bit. In the meantime, preheat the oven to 280F. When ready, bake for 15 to 20 minutes, depending on their size. Let cool. Once baked and if you are not using them right away, store them in an airtight container out of the fridge for a couple of days or in the freezer.

FILLING

INGREDIENTS

1/2 c mascarpone, room temperature
2-3 tablespoon good quality raspberry preserve

DIRECTIONS

In a small bowl, whisk together the mascarpone and preserves together until well incorporated.

ASSEMBLY

  1. Spread filling in between two cookies
  2. Refrigerate for 24 hours to let the flavors really meld together 🙂

Happy Baking!

-Mel

Easter and more chocolate eggs!

So, for Easter, Rob and I were going to his parents house in Ventura. I thought, it’d be cool to recreate my Persian New Year Chocolate Eggs for Easter! After all, the original Martha Stewart idea was, in fact,  for Easter.

They turned out really festive!

So I did the same thing as last. I made little holes on one end of the eggs and emptied the contents. Then I boiled the empty shells for 10 minutes and I was ready to dye! I wanted more Easter colors so I got out all my food colorings and had a party!

They turned really cute and pastel and stripey!

I used my handy dandy styrofoam and pin egg dryer [didn’t take any photos of it this time, but it’s the ame one I used in the Persian New Year’s post]. I let the egg shells dry for  two-three days and then when they were completely dry inside I filled them with dark chocolate candy coating and emptied them again so that just the sides were covered in the chocolate coating.

Then while they were setting, I made some ganache.

Now mix the chocolate and cream together!

Now, fill the eggs with ganache!

They were a big hit! Now, how about let’s serve one up!

Bang it on a hard, flat surface! Then start picking away at the crack that will form.

Now we have the entire chocolate de-shelled.

And for the best part, take a big bite into the chocolate egg!

They were absolutely delicious!

For full directions go ahead and check out my earlier post. I hope you guys enjoyed!

Happy Chocolate-ing!

-Me

Cranberry Oatmeal Cookies

One of my favorite cookies is oatmeal cookies. Whether they have chocolate chips in them, raisins or cranberries! I happened to find a bag of cranberries laying unused at home and thought, how opportune!

Preheat your oven to 350 and line your baking sheets with parchment paper!

Cream the butter, sugar and salt. Then  beat in the eggs!

Now mix in the oatmeal!

Then mix the cranberries [or whatever you’d like to be in them] in! Spoon balls of the dough on your prepared pan and bake for 20 minutes. Let the Cookies cool for 10 minutes before eating.

CRANBERRY OATMEAL COOKIES

INGREDIENTS

  • 1/2 cup (1 stick) unsalted butter, room temperature
  • 1 cup packed dark-brown sugar
  • 1/4 teaspoon salt
  • 1 large egg
  • 1 teaspoon pure vanilla extract
  • 3/4 cup all-purpose flour
  • 2 cups quick-cooking oatmeal (not instant)
  • 1 teaspoon ground cinnamon
  • 1/4 teaspoon baking powder
  • 1/4 teaspoon baking soda
  • 1/4 teaspoon freshly ground nutmeg
  • 1/2 cup cranberries

DIRECTIONS

  1. Preheat oven to 350 degrees. Line two baking sheets with parchment paper; set aside.
  2. In a large bowl, using a spatula, cream together butter, sugar, and salt. Add egg, vanilla, and 1/4 cup water; mix until well combined.
  3. In another large bowl, mix together flour, oatmeal, cinnamon, baking powder, baking soda, and nutmeg. Fold into the butter mixture until well combined. Add cranberries and stir until well combined.
  4. Using a 1 1/2-inch ice cream scoop, scoop out cookie dough onto prepared baking sheets, about 1 1/2 inches apart. Transfer baking sheets to oven, and bake until edges begin to brown, about 20 minutes. Let cookies cool on baking sheet for about 10 minutes before transferring to a wire rack to cool completely.
They’re really simple to make and even more delicious!

Before I leave you guys, I just wanted to share something I think is really cool. Since we’re on the post about one of my favorite types of cookies, I thought it would be appropriate to share a photo of one of my favorite cupcakes [red velvet cupcakes!] made by Grace.
Look how cute!!!! I intro’d you guys to Grace in a previous post about Chocolate Crinkles. Here she has made mini red velvet cupcakes topped with cream cheese frosting and then rolled in crushed pecans. She’s one of the most talented little bakers I know! Grace, I’m really impressed! I hope you make me these next time I come up!
Alright, as always, happy baking!
-Me


Gallery

Another Trip Through Berkeley

This gallery contains 83 photos.

So my third trip to Berkeley this year, I decided to be a bit more comprehensive and document the trip in detail. That’s why I made this post gallery style so it wouldn’t take up the ENTIRE page. Heh. So … Continue reading